Creating and Editing Menus
Why Use Menus?
Menus are useful for keeping a site better organized, and can be beneficial for users as it helps them navigate the site more easily. Many, if not most, sites feature a navigation menu at the top of the homepage that directs users to specific pages across the website. Some examples of menu headers would be an ‘About’, ‘Contact’, ‘Help’ or ‘News’ section.
Adding a Menu
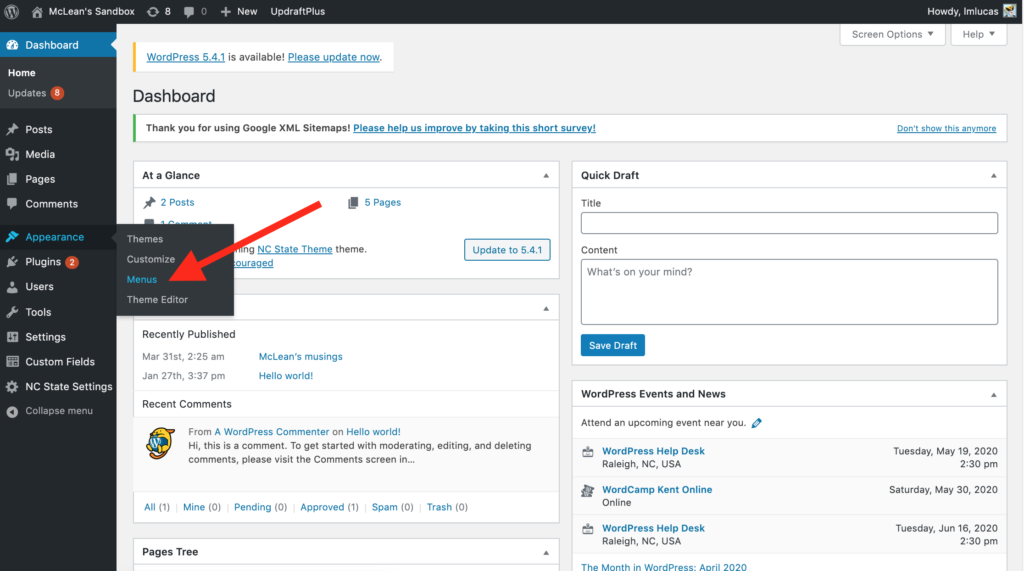
Menus are created through the back-end of WordPress via the Dashboard. To get started with creating a new menu, locate “Appearance” from the left hand menu and click “Menus”.
Instructions:
- From the Dashboard of your WordPress site, hover your cursor over the “Appearance” link in the left-hand menu (see image above).
- From the menu that displays, click “Menus”.
- Next, you will want to provide a “Menu Name” and click “Create Menu”.
- After creating your new menu, under “Add menu items”, you will want to check the Pages, Posts, Custom Links, or Categories you want to have featured, and then click “Add to Menu.
- Now that you have selected the items to build out your menu, check the ‘Display location’ under “Menu Settings” (Note: For a top level menu on the front page of your website, check “Website navigation”).
- Finally, click “Save Menu”.
Tip: Now that the menu has been created, it’s a good idea to preview the actual homepage of the site to assure that it looks correct.
Menus Training
Our Site Administrator 1: Communication and Marketing workshop provides a look into building out menus for a WordPress site. Content maintainers interested in learning more about this process should consider registering for this training.
Need Help?
Still unsure of how to create a menu for your WordPress site? Feel free to reach out with any questions or concerns at go.ncsu.edu/ucomm-dev-request.