
Gravity Forms GA4 Integration

Gravity Forms requires additional configuration to properly track form submissions in GA4. Continue reading to learn how to set it up.

Introduction

This page will quickly walk you through how to set up Gravity Forms GA4 integration. For detailed documentation, view the official Gravity Forms documentation. If you are partnering with UComm on an advertising campaign or if you have opted for full-service analytics with your Landing Page Builder account, we will happily handle this setup for you. Please submit a help request if you require assistance.

Quick Start

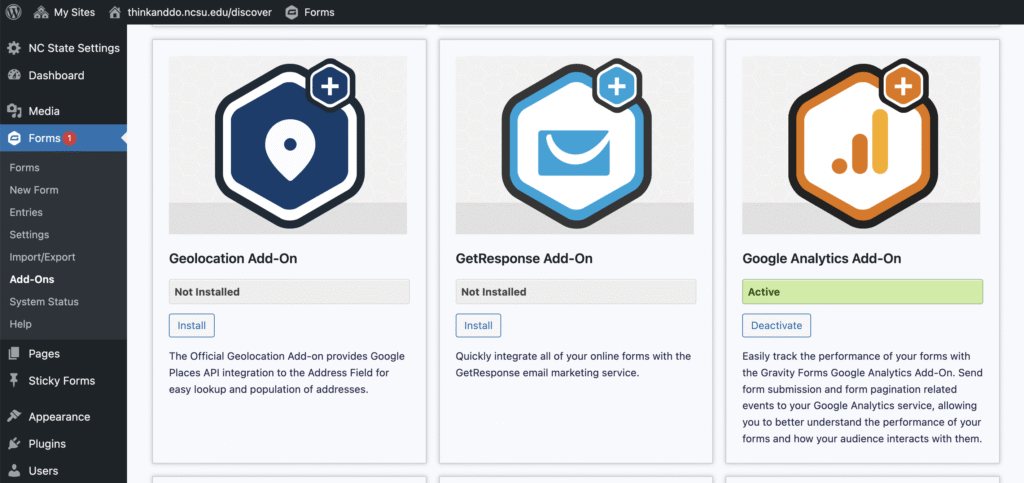
Make sure the Google Analytics Add-on for Gravity Forms is installed and activated:

The screenshot shows the WordPress admin dashboard with the Gravity Forms Add-Ons page open for the site thinkanddo.ncsu.edu/discover. The left-hand menu is visible with sections including NC State Settings, Dashboard, Media, Forms (highlighted with a red notification showing “1”), Pages, Sticky Forms, Appearance, Plugins, and Users. In the main content area, three add-on cards are displayed. The first card is for the Geolocation Add-On, marked “Not Installed,” with a blue icon of a location pin inside a hexagon and an Install button. The second card is for the GetResponse Add-On, also “Not Installed,” with a blue envelope icon inside a hexagon and an Install button. The third card is for the Google Analytics Add-On, marked “Active” in a green box, with an orange Google Analytics logo inside a hexagon and a Deactivate button. Each card includes short descriptions of what the add-on does.
In the WordPress dashboard, navigate to the Gravity Forms add-ons section and install and activate the Google Analytics Add-On.

Next, navigate to Gravity Forms > Settings > Google Analytics and set up the Google Analytics connection. For most users, using the Google Measurement Protocol is recommended and requires the least additional setup and configuration. Follow the prompts to connect Gravity Forms to your GA4 property.

If you are managing your own analytics for your Landing Page Builder account and would like to use Google Tag Manager, please refer to the official documentation. This article from Analytics Mania is also a helpful resource.

The screenshot shows the Gravity Forms Google Analytics settings page in WordPress. It offers three tracking connection types: Google Measurement Protocol (selected and recommended), Google Analytics (flexible option for sending user and source data), and Google Tag Manager (for more control after form submission). The WordPress admin menu is visible on the left.
Gravity Forms GA4 connection type options. Google Measurement Protocol is recommended for most users.
The screenshot shows the Gravity Forms Google Analytics settings page in WordPress. It displays the connection type set to Google Measurement Protocol with options to disconnect, an Analytics Account field, an Analytics Measurement ID starting with “G-,” and a Save Settings button.
When you’ve successfully set up a connection, it should look like this. (Analytics Account and Measurement ID redacted.)

Now, for each new form you create that you would like to measure in Google Analytics, you must create a “feed” within the form settings. If you skip this step on any form you create, you will not have any Google Analytics data for it.

Navigate to the settings for the form you would like to measure in GA4 and, under the Google Analytics settings, click “Add New” to create a feed.

The screenshot shows the Gravity Forms settings for a form named “Analytics test” in WordPress. Under the Google Analytics tab, the Feed Settings section is open, displaying “Google Analytics Feeds” with no feeds configured and an option to create one or add a new feed.

Configure the Google Analytics feed for your form to your liking. Enter any parameters you would like to track in Google Analytics, but you must configure at least one in order for the feed to work. In the screenshot below, we have set the Parameter Name to “gforms_entry_id” and the Parameter Value to “Entry ID.”

The screenshot shows the Gravity Forms settings page in WordPress for a form named “Analytics test.” Under the Google Analytics tab, the Feed Settings panel is open. The feed is named “Google Analytics Feed 1.” The Event Parameters section shows one parameter, with “gforms_entry_id” set to “Entry ID.” Below that is a Conditional Logic Settings section with an option to enable conditions.

If you are using a paginated form, some additional configuration is required to make that analytics data available in GA4. From the previous step, navigate to Form Settings and make sure to check “Enable pagination tracking” and set up any event parameter.

The screenshot shows the Gravity Forms settings page in WordPress for a form called “Analytics test.” Under the Google Analytics tab, the Form Settings panel is open. Pagination tracking is enabled, and an event parameter is defined with the name “gforms_progress” and the value “Progress.” A Save Settings button appears at the bottom.

Click “Save Settings.” If you do a test form submission, you will now see gforms_submission — and gforms_pagination if you are using paginated forms — appear in your GA4 realtime overview.

The screenshot shows a Google Analytics report titled “Event count by Event name.” It lists five events with counts: page_view (5), first_visit (3), session_start (3), gforms_pagination (1), and gforms_submission (1). A small bar chart on the right visualizes the distribution, with page_view being the most frequent.

But we’re not done yet! These Gravity Forms GA4 events will only be available in your GA4 realtime overview until you create custom definitions for them in your GA4 settings. In your GA4 admin dashboard, go to “custom definitions” and add custom dimensions for both gforms_submission and gforms_pagination.

The screenshot shows the Google Analytics 4 “Custom definitions” page under Property settings. The Custom dimensions tab is selected, displaying two event-scoped dimensions: gforms_pagination and gforms_submission, each with matching descriptions and user property/parameter names. Both were last changed on September 26, 2025. Options to search, create a custom dimension, or adjust items per page appear at the top. The left-hand menu shows navigation for property settings and data display options like Events, Audiences, Comparisons, Segments, and DebugView.

This data will now be available in your GA4 reports.

Going forward, remember that you must set up a Google Analytics feed for each new Gravity Forms form you wish to track in GA4.