Mega Menu
Expanded dropdown navigation that provides an organized overview of a website's content
Note: Mega Menu is currently in beta but is now available on all sites running the Premium Add-on.
Overview
A mega menu is an expanded navigation panel that displays multiple categories and links in a single, organized dropdown. Unlike a standard menu, it reveals a broad overview of a website’s structure at once. It employs columns, headings, and grouped links, to help users quickly scan options and navigate your site with efficiency
Getting Started
Before building and then employing a mega menu on a site, there are some considerations one must take. A mega menu is a powerful tool that can improve a site’s navigability and provide clarity concerning a site’s structure; but, there is some nuance when setting up a mega menu for the first time. We will explore these nuances in the sections that follow.
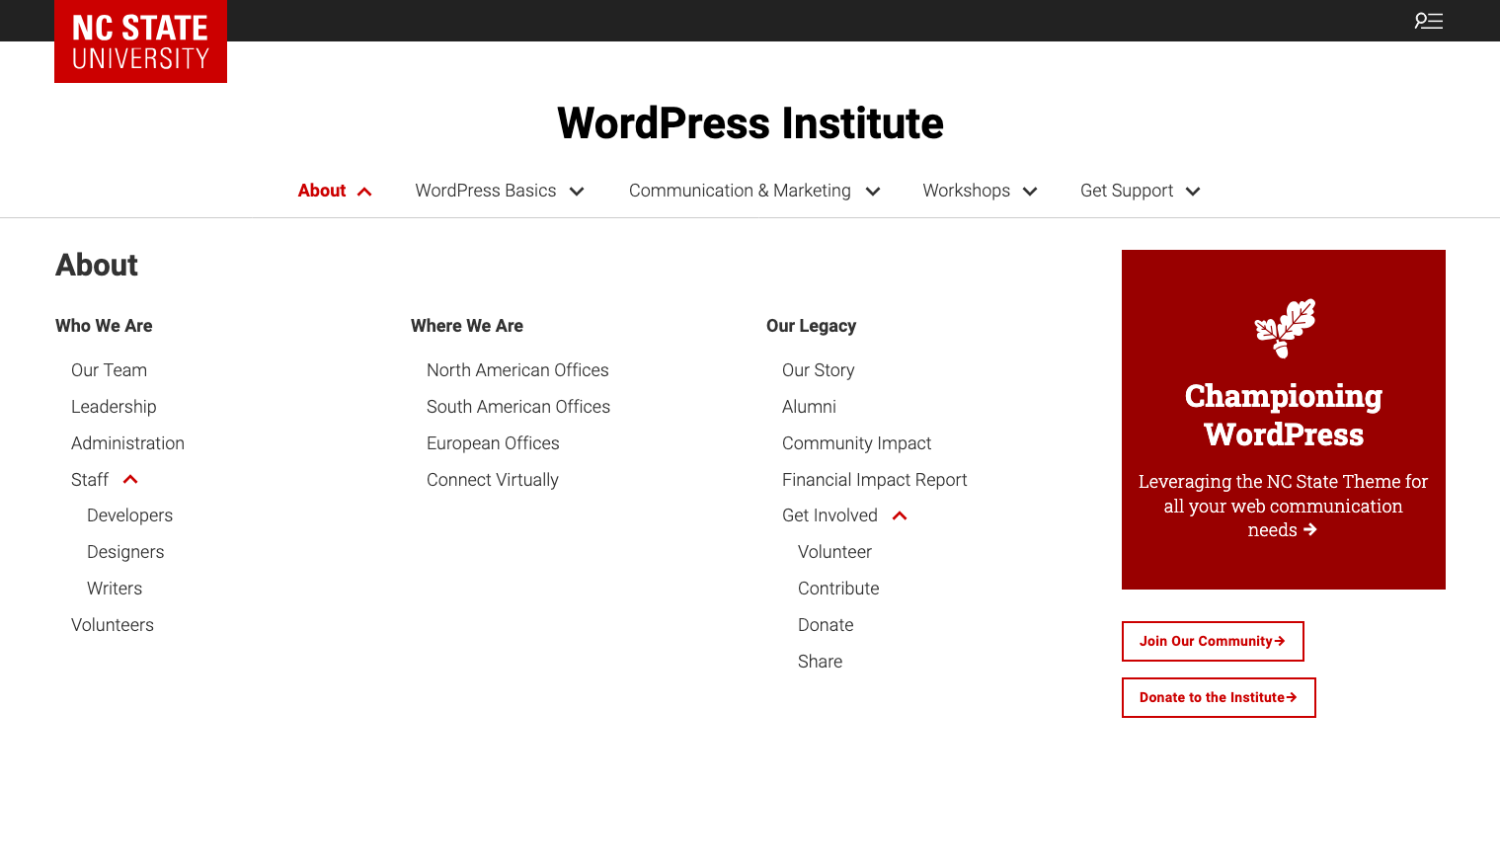
Comparing a Default Menu and a Mega Menu
Most sites running the NC State Theme leverage the default WordPress menu. This menu provides a simple navigation bar that displays links arranged horizontally. It also features a dropdown functionality, which allows users to organize related pages under parent items vertically

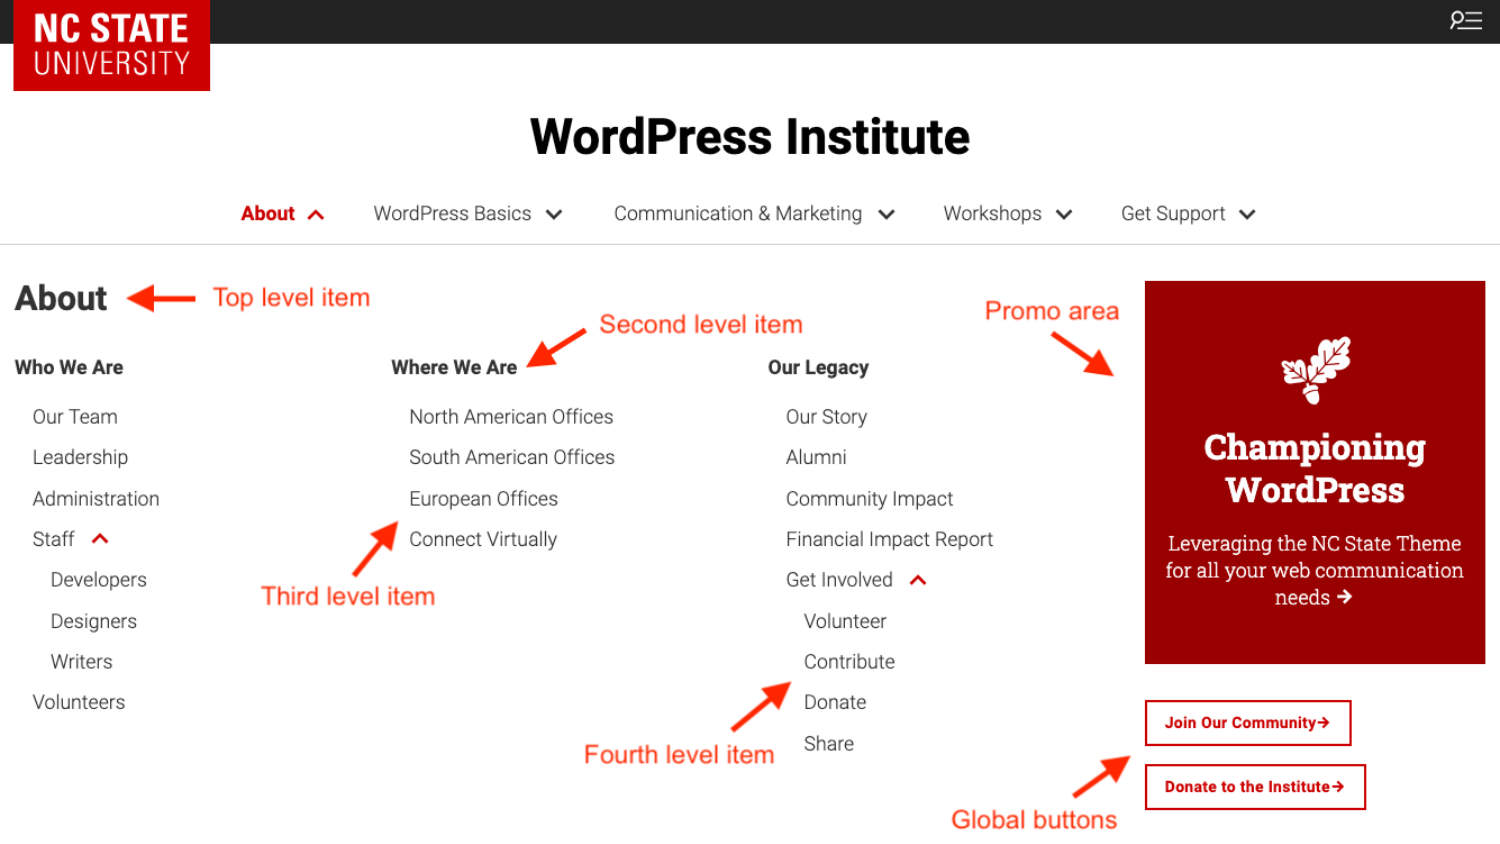
A mega menu is a larger than a standard menu and features a multi-column dropdown navigation panel. These columns will typically represent several categories and links at the same time. Rather than showing a simple list of subpages, it provides a comprehensive snapshot of a site’s structure in one expanded view.
Premium Add-on Requirement
The mega menu feature is only available on sites running the Premium Add-on. The Premium Add-on not only includes mega menu functionality, but also several other features listed below.
Units interested in having the Premium Add-on installed on their site can reach out to our team for pricing information.
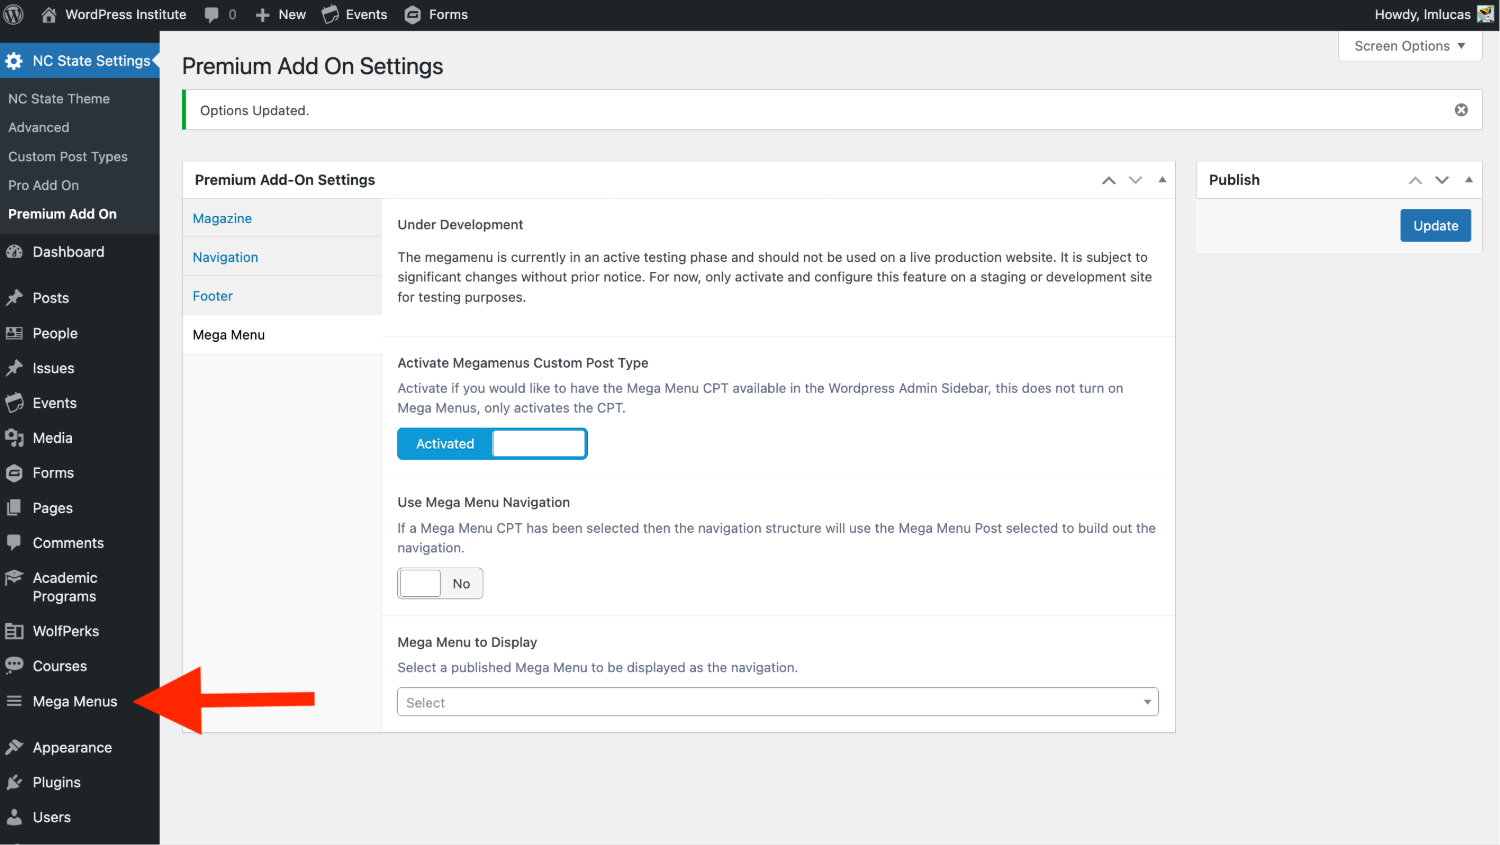
Activate the Mega Menus Custom Post Type
Before building a mega menu, one must first activate the functionality through the NC State Settings. This is because unlike a default WordPress menu, the mega menu is actually a custom post type (CPT). From the WordPress dashboard, one can find these settings under the Premium Add-on section of the NC State Settings.
Creating a New Mega Menu
Following the activation, a “Mega Menus” item should appear in the far left menu of the WordPress dashboard. This is where one will go to create and edit mega menus for their site.
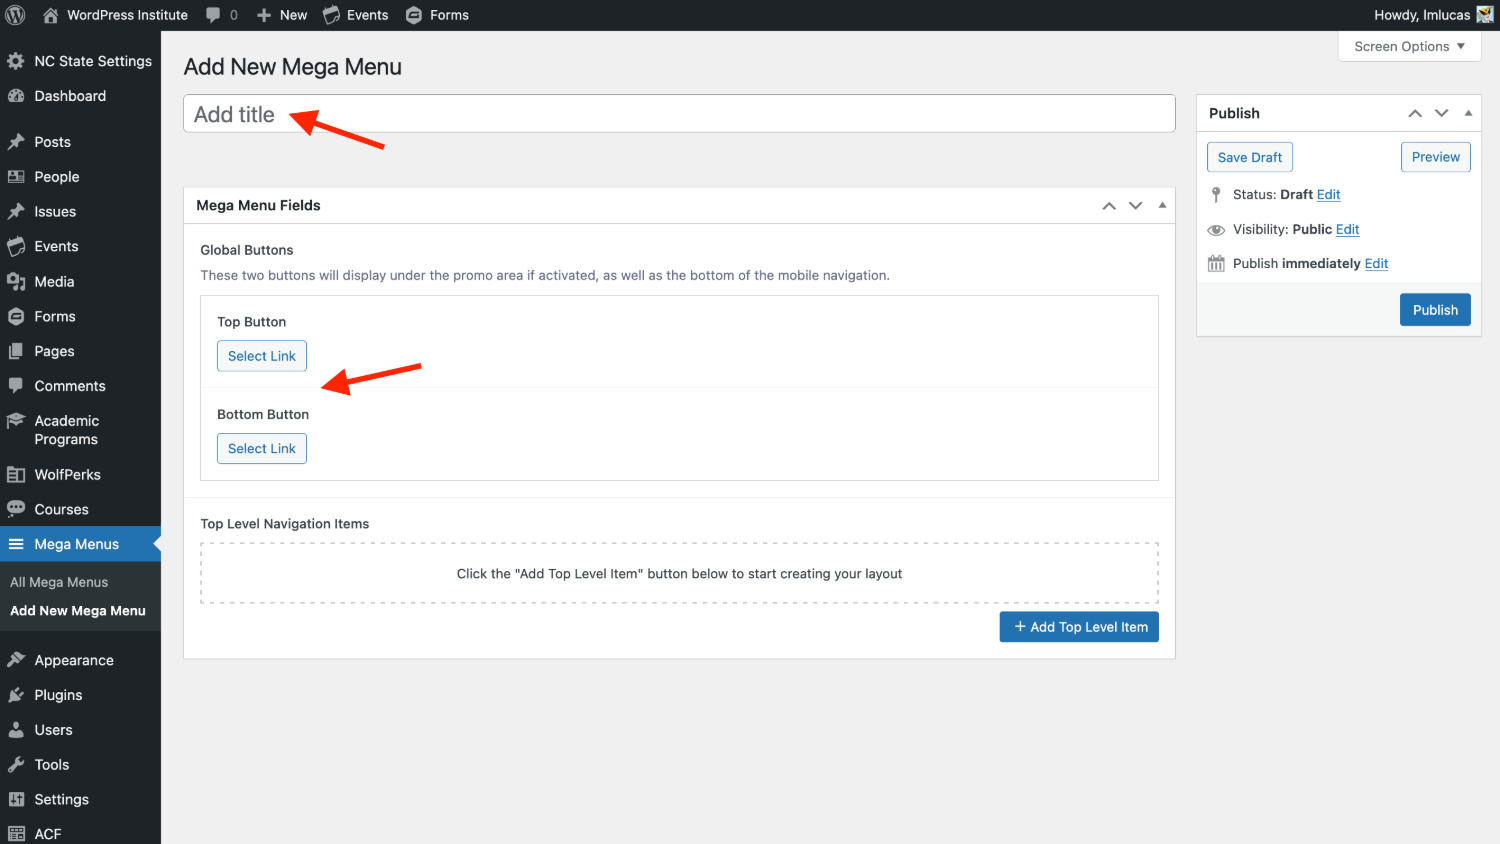
To start building a mega menu, click either of the “Add New Mega Menu” buttons. This will then transport you to the mega menu editor.

Building a Menu
Following the addition of the new, empty mega menu we can start building our navigation into a usable resource. The first thing to do is populate the title field and provide a top and bottom link for our menu’s promo area (more on this later). At this juncture, one should save the menu as a draft or publish the menu. Publishing in this area will not make the menu live on the front-end of your site; an additional step is needed for the mega menu to replace your standard navigation.
Adding Items to a Menu
Now we can begin populating the items that will comprise our mega menu. It is helpful to have an idea of what the top level items will be before we start adding items. To add the first item, click the “Add Top Level Item” button.
A best practice is to add each top level item before populating second, third or even fourth level items. This provides a better idea of the menu’s structure before populating subsequent levels.

The first level is also where one decides whether or not to feature a promotional area in the mega menu. The promotional item can feature on the left or right side of the menu and supports all the brand compliant background colors. Supported promotional content includes one of the following:
- Email Signup
- Event
- Fact Icon
- Image
- Quote
- Spotlight Card
- Text Links
Once our top level items are established, we can add our subsequent menu items. The approach to adding second, third and fourth level items is the same as the first. The major difference, is that first and second level items do not require a link. Whereas third and forth level items do.
Using a Mega Menu
Now that the mega menu is ready, it must be set as the site navigation. To accomplish this, one must toggle on the “Use Mega Menu Navigation” that is found under the Premium Add-on settings we visited earlier. Once we toggle this setting on, we can specify which mega menu we want to use under the “Mega Menu to Display” dropdown.

Need help?
Have questions? Feel free to reach out with any questions or concerns at go.ncsu.edu/ucomm-dev-request.