Instagram Feed Pro Developer Plugin
The Instagram Feed Pro Developer third party plugin, made by Smash Balloon, is a quick, mobile-ready way to display your unit’s Instagram content on your website.
For a demo, see the video below.
Display Options
There are two ways to add an Instagram feed to your page, both of which require additional configuration in the plugin.
| Block | Description | Use Case |
|---|---|---|
| Instagram Feed Block | Displays visual content from an Instagram feed in a small, styled block with space for a title, teaser and call to action button. | Pages where you want a quick preview that links to your Instagram page. More purposefully drives engagement with your Instagram. |
| Shortcode Block | A more flexible option that supports two recommended custom layouts (Highlight and Carousel) that highlight your Instagram’s imagery. | Pages that need more visual content that has already been curated in your Instagram feed. More about the visuals, less about engagement. |
Connect an Instagram Account
Before you can create a feed, you’ll need to connect the plugin to a source (an Instagram account).
- Log into the Instagram account you want to connect
- In a separate tab, navigate to your WordPress dashboard and go to Instagram Feed then Settings.
- Under Manage Sources click Add Source.
Instagram Feed Block
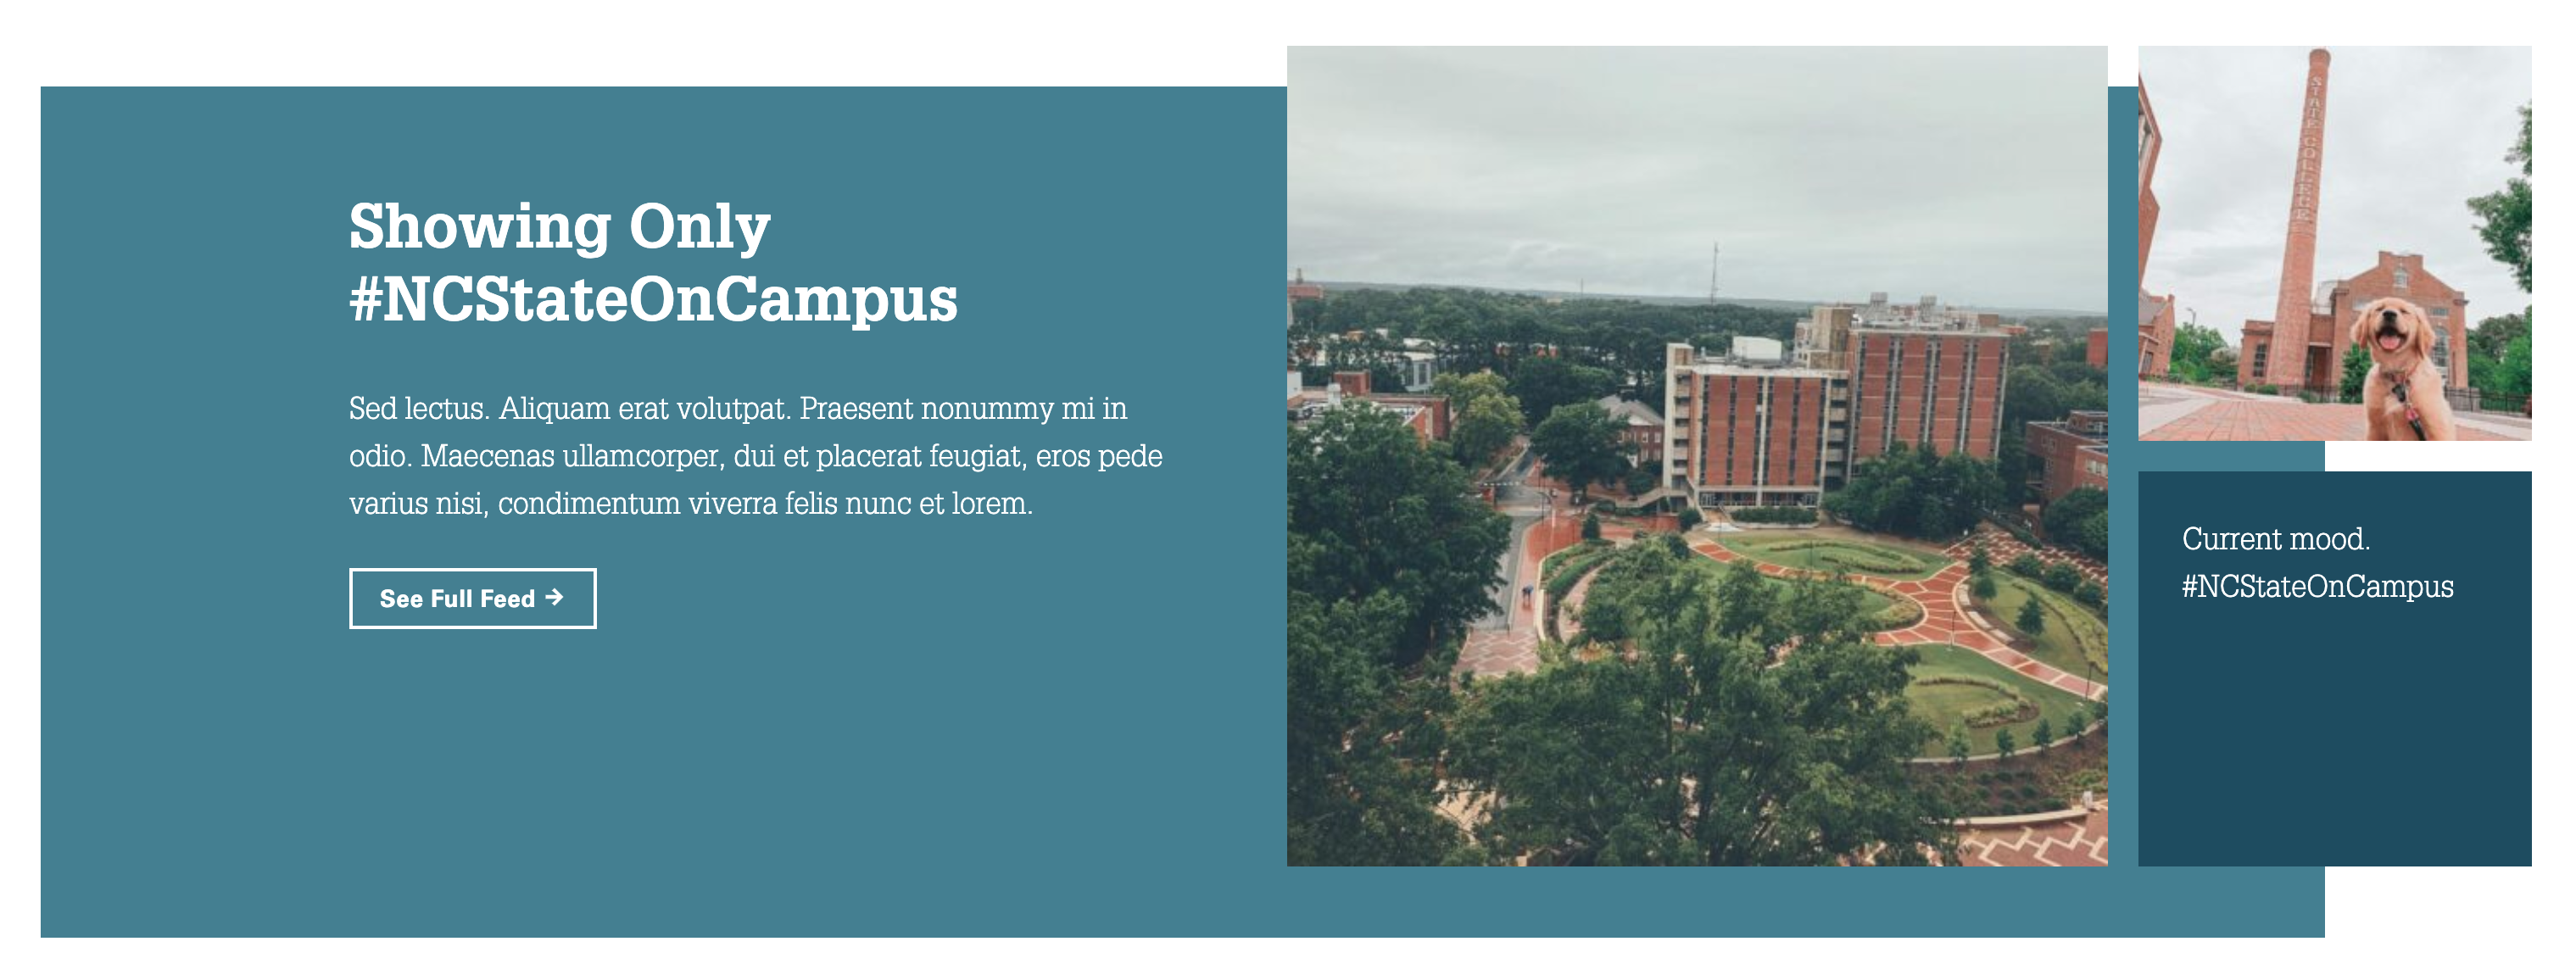
The Instagram Feed block is a good option for displaying visual content from an Instagram feed, as well as driving users to view and engage with Instagram channel content.
View the Instagram Feed block documentation to set up this block.
Shortcode Block
Use the Shortcode block to display Instagram feed content in a custom layout, using shortcode generated after configuring the feed and its layout settings in the plugin.
For the Shortcode block, we recommend creating either a Highlight feed or a Carousel feed. Follow the instructions below for whichever layout fits your page.
Create a Highlight Feed
- Navigate to your WordPress dashboard and go to Instagram Feed then All Feeds
- Click Add New
- Select User Timeline as the Feed Type and click Next
- Select the source created in the Connect an Instagram Account section above and click Next
- Select Default Theme and click Next
- Select Highlight and click Next
Your feed has been created, and you should now be on the Customize options page. Follow the steps below to match the styling shown in the example above. Note that these steps only cover settings you need to change. Any setting not mentioned keeps its default value.
- Select Feed Layout
- Under Highlight Settings set Highlight every to 6
- Under Padding input 0
- Under Number of Posts set Desktop to 35 and Mobile to 35. This is what displays in the above example, but you change this number to fit your needs.
- Under Columns set Desktop to 6, Tablet to 6 and Mobile to 3
- Click Customize at the top of the page to return to the customize options
- Select Header and click the toggle to Disable
- Click Customize at the top of the page to return to the customize options
- Select Posts
- Click Hover State
- Change Background to #CC0000
- Change Text to #FFFFFF
- Under Information to display select only Caption
- Click Customize at the top of the page to return to the customize options
- Click Hover State
- Select Load More Button
- Under Color change Background to #CC0000, Hover State to #990000 and text to #FFFFFF
- Click Customize at the top of the page to return to the customize options
- Select Follow Button and click the toggle to Disable
- Click Customize at the top of the page to return to the customize options
- Select Lightbox and click the toggle next to Comments to Disable
- Click Customize at the top of the page to return to the customize options
- Click Save in the top right corner.
- Click </> Embed and copy the shortcode. Your feed is now ready to add to a page.
Create a Carousel Feed
- Navigate to your WordPress dashboard and go to Instagram Feed then All Feeds
- Click Add New
- Select User Timeline as the Feed Type and click Next
- Select the source created in the Connect an Instagram Account section above and click Next
- Select Default Theme and click Next
- Select Default and click Next
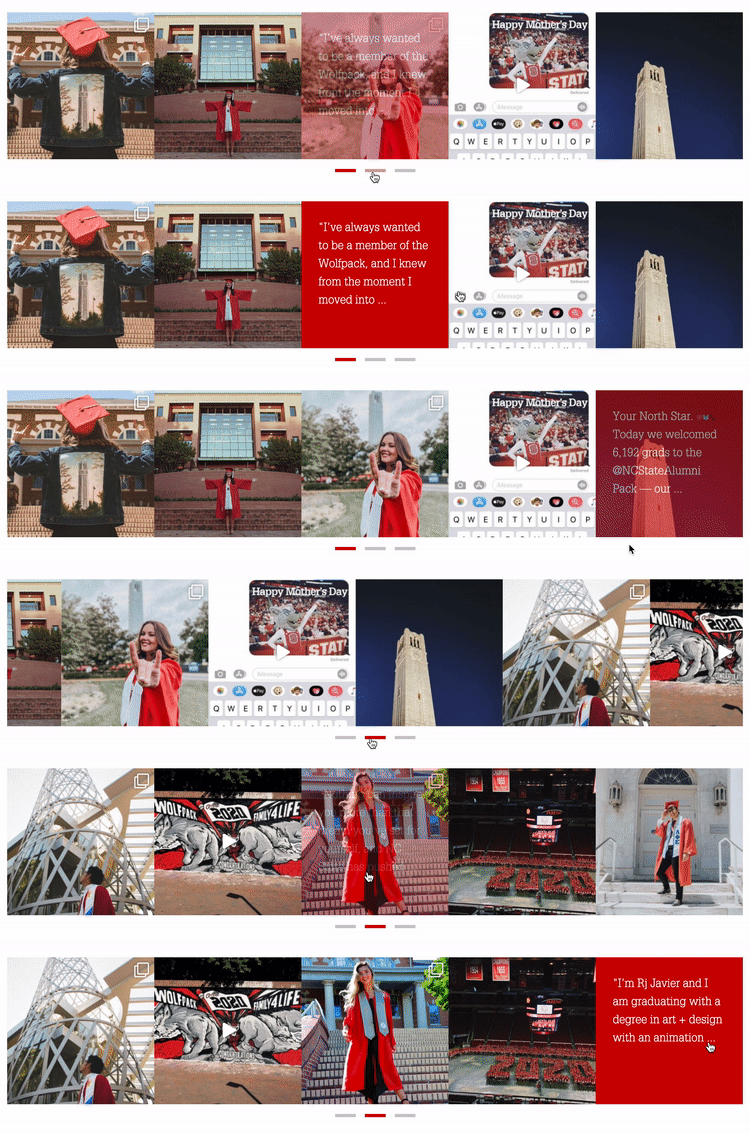
Your feed has been created, and you should now be on the Customize options page. Follow the steps below to match the styling shown in the example above. Note that these steps only cover settings you need to change. Any setting not mentioned keeps its default value.
- Select Feed Layout
- Under Layout select Carousel
- Under Padding input 0
- Under Number of Posts set Desktop to 15 and Mobile to 15
- Under Columns set Desktop to 5, Tablet to 5 and Mobile to 3
- Click Customize at the top of the page to return to the customize options
- Select Header
- To follow the example above, click the toggle to Disable
- If you would like to use a header, keep it toggled to Enable and adjust these settings:
- Under Text set Color to #CC0000
- Click the toggle to Disable Show Bio Text
- Click the toggle to Disable Include Stories
- Click Customize at the top of the page to return to the customize options
- Select Posts
- Select Caption and click the toggle to Disable.
- Click Posts at the top of the page to return to the posts options
- Select Like and Comment Summary and click the toggle to Disable.
- Click Posts at the top of the page to return to the posts options
- Click Hover State
- Change Background to #CC0000
- Change Text to #FFFFFF
- Under Information to display select only Caption
- Click Customize at the top of the page to return to the customize options
- Select Caption and click the toggle to Disable.
- Select Load More Button and click the toggle to Disable.
- Click Customize at the top of the page to return to the customize options
- Select Follow Button and click the toggle to Disable.
- Click Customize at the top of the page to return to the customize options
- Select Lightbox and click the toggle next to Comments to Disable
- Click Customize at the top of the page to return to the customize options
- Click Save in the top right corner.
- Click </> Embed and copy the shortcode. Your feed is now ready to add to a page.
Add a Feed to a Page

- Copy your feed’s shortcode by clicking </> Embed after configuring your custom options or by navigating to Instagram Feed then All Feeds, locating the Shortcode next to the feed name and clicking the Copy Shortcode button
- Edit the page where you would like your feed to appear
- Insert the Shortcode block and paste in your feed’s shortcode
- Note that the feed will not appear in the back end but can be seen in preview and the front end once saved
- Click Save
Additional Plugin Display Options
The Instagram Feed Pro Developer plugin also allows you to customize the feed to show general content or highlight a specific event, by displaying an Instagram hashtag feed or displaying photos from multiple user accounts in the same feed.